Sunday, October 20, 2013

Julep nail polish review

          I have been receiving products from julep for almost two years now. I absolutely love everything I have gotten. Every time I think I should cancel because I don't need anymore, they send something else to keep me hooked. This month's box included a matte black nail polish, a deep red, a glittery green, and a glow in the dark! I will be adding those products to review soon.

        For now, I want to share about a glitter nail polish that I instantly fell in love with. It is called Julia. Looking at the bottle, it appears really gold and glittery. Once you put it on, the purple color shows through, as well as the glitter.  What I love most about the glitter is that is is not the big chunky glitter pieces that will get caught on everything and be a pain to get off. It gives you the look of glitter without the feel of a glitter nail polish. And- the best part is- it comes off just like a regular nail polish!

  I have a few different colors of Julep's nail polish, and I love them all! I can't wait to share more!

If you want to sign up to get your own box of goodies every month, just follow this link:  
Http://www.julep.com/rewardsref/index/refer/id/14844

P.S. Your first box is free!! :)


Monday, September 23, 2013

Menu Plan Monday!


 Gosh, it has been a while since I posted my weekly menu plan! I took the summer off from blogging, both here and on my photography blog. We were so busy, I just didn't have time for it. Now that school is back in session, I am playing catch up!
         
          Our menu for this week is pretty easy. With soccer, boy scouts, youth group, homegroups, birthday parties, and the ClickinWalk this weekend, we have a pretty full schedule in the evenings.


          Today, we are having Crock Pot Mexican Chicken.
I start with THIS super easy recipe from Pinterest. I add some Tupperware Chipotle seasoning (you can use taco seasoning, too!) And sometimes serve it with rice. The chicken shreds so nice when it is time to eat. We usually just pile it on to tortilla chips and have nachos. It is also good in burrito/taco form!

          Breakfast for dinner tonight!

I love breakfast for dinner! I don't always want to make a big meal in the morning, but by the afternoon, it is so much easier!

          We will be having eggs, bacon or sausage (or both!), pancakes or waffles, and biscuits. I also have a bunch of fruit we could eat, too. I am definitely looking forward to tonight's dinner!

          Pasta night!

Penne with homemade tomato sauce, and garlic bread. Super easy!

          Chicken Alfred on the Crock Pot.

Another Pinterest find, and a favorite of my oldest! Crock pot cooking is my favorite. I love how I can throw it all in, and have dinner whenever we are ready! All this recipe needs is chicken (you can even put it in frozen!) a jar of alfredo sauce and some broccoli!

We will be having this over rice tonight, since we had pasta last night!

          Pizza night!

Nothing new on Friday! We will be having some sort of pizza. Whatever we can find to throw on top! Maybe some fresh popped popcorn, then off to soccer practice and home group where we will enjoy this awesome dessert!


          This is the busiest day! We have a soccer game in the morning, a birthday party after lunch, and I will be going to the ClickinWalk in the evening! Who knows what is going to happen for dinner?!

        
On another note, if you love taking pictures and have some free time this weekend, you should try and join your local ClickinWalk!! It is going to be so fun!

          We are going to end this busy week with sloppy joes and fries. Maybe a salad to add some healthiness to it!


I will be linking up with I'm an Organizing Junkie for Menu Plan Monday! I'm hoping to find some new ideas for our menu!

What are you cooking this week?


Tuesday, July 16, 2013

Hey! Where have you been??
Here I am. Gosh, it's been a while. We have had so much going on the last few months with school ending, summer activities, and many other things! I feel so far behind!! We have been working on a few fun projects. I thought I would share one to get back into the swing of things!!
I have been seeing a lot about Rit Dye, and it got me wanting to dye something of my own. but it couldn't just be anything. I wanted to make it worth it! We have this bed set that we have had for 3.5 years now. I LOVED it when we got it. I still love it...super comfy, keeps me warm, nice and broken in, all that good stuff...but I just wanted something different. Last time I looked at new bed sets, the ones I wanted were over $200. I thought, "Not this time! I'm going to dye my own!!" SO I did!
Here is what they looked like before:

 The sheets were off white, and getting boring...

The comforter was maroon and white...


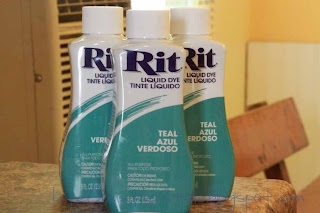
I went on the hunt for the perfect color...and was lucky enough to find just what I wanted!
 I read lots and lots of directions and tutorials before I got started. We have a front loading washer, so I had to make sure I did everything right. I found THIS super helpful article from the Rit Dye Company! I gave my sheets a quick wash, and began adding the dye! This is what it looked like:

 I decided to do the comforter a little different since it was so big. I didn't want to end up with a tye-dye comforter! I did MORE research about dying in the tub, and enlisted the two cutest helpers ever to help "agitate"
 Then we rinsed out all the teal water! (This took a while!)
 It only took me three days a little while to get around to cleaning the blue ring out of the tub!
After one more quick wash of everything to make sure the dye was all out...we had a brand new bed set!! What do you think??


Saturday, July 13, 2013

Throwback to my childhood

Did you ever make sand art as a kid? I always had so much fun mixing the colors and making new designs.

I came across this link on Pinterest and thought it would be a great way to kill some time this summer. It didn't take long to be able to put it into action! I got super lucky and found a box of sidewalk chalk on clearance and I had an extra 20% off coupon! I think I paid less than $2 for the box! I also had two small jars that have been hanging around our house for way too long, so this project cost around $3 for us! (I had to buy a new container of salt)

We I decided to take the project outside so I would have to clean up salt from everywhere. Best. Idea. Ever!
Even though it was super bright out!


The boys enjoyed the project. It is hard to keep a two and a half year old occupied long enough to get the salt colored, but he really enjoyed helping me pour it into the jar!


 Kyle's finished product! I knew that horseradish jar would come in handy one day!

Tuesday, April 16, 2013

What to Wear- Choosing Necklaces for Necklines

Have you ever wondered what type of necklace you should be wearing with that shirt you love? I do this all the time! I can never figure out which style "fits" best. Luckily, the fols over at Polyvore were nice enough to put together this helpful guide, and thought I would share it with you! I even have the image saved to my phone in case I am out shopping and want to match it all up!
What is your favorite combination?
Hop over to Polyvore for the links to the choices you see here!

Wednesday, April 3, 2013

Making a fire!

      We love to go camping in the summer! Every year, we try to go as often as possible! Our season usually starts in late April-May, but this year we get to go early! In fact, by the time you read this, we will be on our way home from our first 2013 camping trip!
        One problem we had come up quite a bit last year was getting the fire started (in a timely manner!) It was usually because the wood we got was wet. Because we travel out of state, and because there is a big bug issue up here, we are not allowed to bring our own weeod. This means we just get to deal with whatever the campground has or what we cam find around our site.
         Last year, my friend told me about these fire starters she found on Pinterest. I do not have the exact link that she used, so I decided to make my own. I have all these random half empty jars of candles floating around the house. I usually keep a jar on the stove,a nd forget to move it when I tuen the oven on, so the whole thing melts and the wax falls in :/ You would think by now I would have learned to move the candle before turning on the oven, but no. It is onyl after I start smelling the candle that I realzie why I am smelling it!
           Anyways....I gathered these jars and started saving the wax when I would change my Scentsy smells. I also added broken pieces of candles and tarts. I started saving my dryer lint in an empty spaghetti sauce jar. Since it was winter, I figured I would have plenty of time to save before I needed them. The last ingredient I needed was shredded paper. We have a shredder that always has something in it, so this was the easiest part. Of course, when I needed it, I realized my husband had just emptied the shredder! I just grabbed some junk mail and and newspaper and shredded it up real quick. I was sure to not use any of the slick pieces of paper, just newspaper type.

        First, I got a pot of water boiling to melt the wax. Add enough water to cover the wax level, but not the jar.


Then, I put the jar in the water so it could start melting while I prepped the rest. Isn't it pretty?


I grabbed a muffin tin and added some paper liners. I have an abundance of these, so I doubled up for extra holding power. I also thought it might help light better later.


I added a good layer of lint first.


Then I added some shredded paper. It is okayif it looks like too much. Once the wax goes in, it will help the pile go down.


Finally, once the wax started to melt, I began pouring it into the liners. (Use a hot pad, the jar is hot!)
I filled them to about 3/4 full.

 
And voila! Fire starter cupcakes!


          I am very excited to use these. They make the fire smell awesome, too! Just imageine all your favorite candles  rolled in to one! I love it!

Be sure to check back for the recap of our first camping trip of the year!! I am SO Excited!!!


Did you figure out what J made for his scratch art photo??
 

Tuesday, April 2, 2013

Scratch Art!

      Do you remember getting the little scratch art kits as a kid? The ones that look black and come with the little stick so you can scratch your way to an awesome picture? I loved those!
      I am an assistant in an art class, and this was one of the recent assignments for the kids. I made one myself in high school, and I forgot how easy it was to do, and how much fun it could be. I am so glad I was reminded. Of course, I had to share it with my own kiddos, and now with you!
     First, I had them color a blank piece of paper out of the art pad. A heavy piece of cardstock will work, too! Just draw any pattern or design. Any colors. I reminded J to color pretty dark. He had no idea what we were doing, so he just thought I was being crazy asking him to draw a random pattern and push hard! For mine, I chose to do different shades of green since I was going to use it as part of my St. Patrick's Day decor. Jacob chose to use different bright colors. I also made one for K to do, and chose different colors. I made a diagonal line pattern. Jacob did big blocks.
     Then, I pulled out my bottle of *black* acrylic paint and painted over it all! Again- J thought I was crazy for destroying his art work!! I did two coats to make sure it was all covered nicely.
      We let it dry overnight and the next day I gave J a skewer (just one for shishkebobs, nothing fancy!) and it was then that he realized what the heck we were doing! He was pretty excited! He got right to work making his masterpiece!
This is the beginning of mine for St. Pat's
 
And the end result!


Can you find the four-leafed clover?

 
Kyle had fun scribbling his to reveal the color!


 J was hard at work in his pjs, so he wouldn't let me get a full photo of him! :)

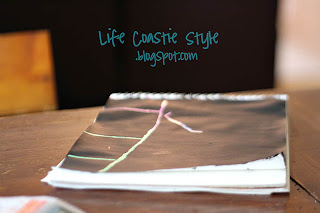
Can you tell what it is??
 

Come back tomorrow to see the finished piece!!


We had a lot of dun doing this craft! We always enjoy craft days!
What are you making this week??
I would love to see your photos and ideas! You can share them over at the LCS Facebook page!


See you soon!

Friday, March 29, 2013

IKEA Hacks

        Have you heard of these? I just recently had a conversation about this new trend. Now I love IKEA, but I never thought to makeover the items i have bought.
        Until I heard someone talk about these hacks...So I started to do some research. I have this table from IKEA that I bought for my little one. I wanted something that he could sit and eat or play at, that didn't take up too much space, so he could be in the kitchen with me. This table won when I saw that it came with two chairs and was only $20! I started to browse through Pinterest (there are lots of great ideas there!) and saw people were doing all kinds of makeovers to IKEA furniture! I started to get really excited!
         Now, I am a very much an instant gratification kind of girl. I did not want to wait until my husband came home to help, so I got to work. I went into the garage and found out we had some paint left over from when I painted our entry way. It was blue...how perfect for a little boy! Then I found the leftover chalkboard paint from painting our chalkboard wall...even better! Finally, I wanted something fun for the chair covers. During my research, I saw many options. Since I knew my two-year-old would be eating/drinking (Spilling!) at this table, I wanted something that was somewhat water resistant...(Insert light bulb moment here) I chose contact paper!! We always have lots of it, so, once again, I didn't have to make a special trip. Instead of just using plain white (boring) contact paper, I used some clear and put a colroful piece of scrapbook paper underneath! Are you ready to see the results?
First- here is the before:


 Cute, but boring!
Here is the mess I made while refinishing!
 
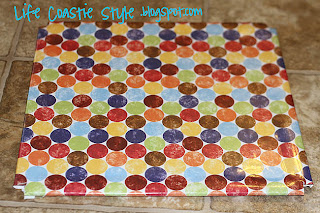
And the seat with scrapbook paper and contact paper
 
Did I tell you the best part....I used chalk board paint for the top!!


And finally....the finished product!


What do you think?? I would love to see anything you have transformed from IKEA!!


Thursday, March 28, 2013

St. Paddy's Day Crafts

       Since it is almost Easter, and since I missed almost the whole month of March, I think it is only fair that I share our crafts we made for St. Patrick's Day! This way, you can be {WAY} ahead for next year!
       It seems odd to me that St. Pat's and Easter are in the same month. Isn't Easter supposed to be in April? I am  not complaining- I love Easter, but it just seems strange.
       Anyways...we made St. Pat's crafts at the beginning of the month, and waited until after to start on the Easter ones ( I will be sharing those soon!)
One of the first crafts we did were these shamrocks:

 To make these, I cut one sheet each of dark green, light green, and yellow tissue paper into squares. They do not have to be perfect little squares. Just small enough to have room for lots of colors.


Then, I got a piece of green cardstock and cut out the outline of a shamrock. I got a piece of clear contact paper and placed the outline on to it. I let the boys go to town "decorating" their clovers. Jacob chose to place carefully, while Kyle wanted to dump the whole bucket and be done! :)


When they were all done, I put another piece of contact paper on top to hold it all toether and cut out the shape. It is now hanging on our awesome hanging thing from IKEA.

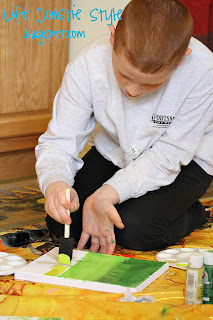
We also made another painting like the one we made for Valentine's Day. This time, I let Jacob do the painting, and gave Kyle a little canvas of his own to do what he wanted with. I am seriously in love with what J decided to do. It looks awesome! Before I share, here is what that project looked like!
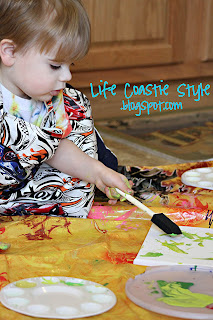
Lots of green paint!


We only made a *little* mess!! :)

 
J hard at work!

Here is the end result! I can't stop looking at it! I think he did a great job!


One final thing we ( I ) did was a scratch art picture. I will be sharing the whole project next week, but for now, this is what it looked like to start


 I can't wait to finish sharing the rest of our month with you! See you soon!