I really enjoy wrapping gifts. I always have. I do think it is more fun during the holidays, though. I love all the options for wrapping paper, bows, tags, etc. This year, we had a few gifts that needed to be mailed. I'm not one to just ship them in a boring box. For some reason, I didn't do a lot of wrapping, though. Each gift got wrapped in a pretty tissue paper, before it was put in the box, but that was all. It's the rest of the packaging that I am excited about!! :D
While browsing the dollar store a few days ago looking for some mini elf-sized items for our elf, I found this faux snow!!! I knew I had to do something with it, so I grabbed 3 bags!! I already had somewhat of an idea how I wanted to package the boxes, but this was going to have to be added in!
I had these little wooden things (?) I'm not really sure what they are for. I've had them for a while. Maybe tied to a gift?? Anyways...I had Joy, Merry, HoHoHo, and Peace. Each box got one. See the pretty tissue paper?? This box is for my brother (mostly my niece) Her favorite color is red, so I wrapped her gifts in various red tissue papers. The bag is for my sister in law. It has some of the sugar scrub in it that I shared yesterday.
We love getting a real tree every year! We had a few clippings left over, so I added some pieces to the boxes. I also got a giant bag of cinnamon scented pine cones, and had some left over, so everyone got one or two of those, too!! :D
And then...in went the snow!!
I may have added a little too much, but my parents are in Key West, and my brother and his family are in Texas! I think they could use a little snow in their lives. Even if it is fake! I just hope they don't hate me too much when it comes time to clean it all up!! :D Hahaha....This stuff is no joke! Little L got into the bag and spilled it everywhere! The little beads don't like to be picked up so easy!
How would you feel about opening a box full of "snow"??
Showing posts with label holidays. Show all posts
Thursday, December 18, 2014
Friday, December 12, 2014
12 Days of Christmas Crafts | Day 7 | Reindeer Food
Have you ever made reindeer food??? This is something my kids have enjoyed doing for years! I have made different versions of it, but I decided to go with something quick and easy today. (Have you noticed a theme this month??)
I grabbed a big Ziploc bag
1 cup of oats ( you could totally use packets of oatmeal, too!)
and my giant container of sprinkles that never seems to end!
Step 1:
Have a cute little helper open the bag and pour the cup of oats in!
Step 2: Start sprinkling!!
Wait until you hear, "This is so much fun!!" before checking just how many sprinkles are accumulating in the bag!
Give the bag a good shake, and you're done! Now all we have to do is wait for Christmas Eve so we can sprinkle it on the lawn for the reindeers. They will have some carrots, too, to balance out all the sugary sprinkles! :)
You can see the other 12 Days of Christmas Crafts here:
Day 1
Day 2
Day 3
Day 4
Day 5
Day 6
I grabbed a big Ziploc bag
1 cup of oats ( you could totally use packets of oatmeal, too!)
and my giant container of sprinkles that never seems to end!
Step 1:
Have a cute little helper open the bag and pour the cup of oats in!
Step 2: Start sprinkling!!
Wait until you hear, "This is so much fun!!" before checking just how many sprinkles are accumulating in the bag!
Give the bag a good shake, and you're done! Now all we have to do is wait for Christmas Eve so we can sprinkle it on the lawn for the reindeers. They will have some carrots, too, to balance out all the sugary sprinkles! :)
You can see the other 12 Days of Christmas Crafts here:
Day 1
Day 2
Day 3
Day 4
Day 5
Day 6
Wednesday, December 10, 2014
12 Days of Christmas Crafts | Day 6 | Pillow Covers
Today's post actually comes from a couple weeks ago. I took a trip to IKEA. I really really love that place!! I found these great pillow covers for only $6! I couldn't decide which one I wanted more, so I got one of each. I don't have enough pillows in their size to get two of each. Our living room couch has 6 pillows on it, 2 of each size. I had the middle size covered, so I needed to find something for the others. I ended up going to JoAnn Fabrics a few days later on a mission. I wanted something Christmas-y, but I didn't want Christmas Trees and Presents and such. I also wanted a heavier fabric than all the holiday prints offered. Our living room is very neutral, so I wanted to bring in some seasonal color. I ended up finding a solid marigold color and a green printed fabric that I love.
I usually make envelope-style pillow covers, but I found a bunch of zippers in my stash that I decided to use this time! They were the perfect size! I even love how the colors compliment the fabric, but aren't the same color (or just plain white!) There was no method to these covers. I laid my pillow on top of the piece of fabric, added about an inch, cut it, and sewed it shut. I wanted something quick and easy, and that is how I accomplished it! I don't always have time for pre-planning and measuring and pinning and such!
Here's how they all look on the couch! What do you think??
I am very pleased with how they all turned out. I love walking into the room to see the bright colors. It's even better to know that I MADE it! (Except the two from IKEA, of course!)
This guy is sure enjoying them! :)
I have no idea what we will be crafting tomorrow, so be sure to check back!! :)
Find me everywhere!
Facebook
Instagram
I usually make envelope-style pillow covers, but I found a bunch of zippers in my stash that I decided to use this time! They were the perfect size! I even love how the colors compliment the fabric, but aren't the same color (or just plain white!) There was no method to these covers. I laid my pillow on top of the piece of fabric, added about an inch, cut it, and sewed it shut. I wanted something quick and easy, and that is how I accomplished it! I don't always have time for pre-planning and measuring and pinning and such!
Here's how they all look on the couch! What do you think??
I am very pleased with how they all turned out. I love walking into the room to see the bright colors. It's even better to know that I MADE it! (Except the two from IKEA, of course!)
This guy is sure enjoying them! :)
I have no idea what we will be crafting tomorrow, so be sure to check back!! :)
Find me everywhere!
Tuesday, December 9, 2014
12 Days of Christmas Crafts | Day 5 | Christmas Cards | Addie Lynn
Today we are doing a special kind of craft. Tomorrow is my husband's birthday, so I planned on helping K make him a card. Then I came across THIS post in my Facebook feed from the Today show. Breaks my heart. So we decided to make an extra card to send to Miss Addie Lynn and her sisters for Christmas.
I just grabbed some cardstock, photo tape, and Christmas stickers.
I love this stuff. I only use it for special occasions because I'm afraid I'm going ot run out and not be able to get more! :)
I took a piece of patterned cardstock and taped a plain piece on the inside so we would have somewhere to write.
Then we decorated the outside with stickers, and wrote a message inside.
I even decorated the outside of the envelope, because who likes a plain envelope?? ;)
And there it is...a fun handmade Christmas card on its way to Addie Lynn and her sisters!!
If you have time to make a card, or even just mail an extra, you can send one to Addie, too!!
Here is her address:
Addie Lynn and Sisters, P.O. Box 162, Fountain Green, UT 84632
You can also donate to her medical bills HERE and visit Addie's Facebook page HERE!
Now I must get a move on our other Christmas cards!!
Find me on Facebook!
Have a question? Send me a message!! kajpics@yahoo.com :D
I just grabbed some cardstock, photo tape, and Christmas stickers.
I love this stuff. I only use it for special occasions because I'm afraid I'm going ot run out and not be able to get more! :)
I took a piece of patterned cardstock and taped a plain piece on the inside so we would have somewhere to write.
Then we decorated the outside with stickers, and wrote a message inside.
I even decorated the outside of the envelope, because who likes a plain envelope?? ;)
And there it is...a fun handmade Christmas card on its way to Addie Lynn and her sisters!!
If you have time to make a card, or even just mail an extra, you can send one to Addie, too!!
Here is her address:
Addie Lynn and Sisters, P.O. Box 162, Fountain Green, UT 84632
You can also donate to her medical bills HERE and visit Addie's Facebook page HERE!
Now I must get a move on our other Christmas cards!!
Find me on Facebook!
Have a question? Send me a message!! kajpics
Friday, December 5, 2014
12 Days of Christmas Crafts | Day 4 | Popsicle Snowflakes
Today's craft does not include a lot of photos, unfortunately. There are two reasons for this: 1. It went so fast. 2. L decided he REALLY wanted to help and kept sticking his cute little chubby hands in every photo! :) (See below!)
I do have enough that you can get the general idea, though!
Here are the supplies we used:
Popsicle sticks (K chose blue because we had them in the stash, but you could obviously use any color!)
Those awesome double sided sticky dots from yesterday's craft
MORE buttons!!
That's all!
We started by using the sticky dots to build the snowflake.
K then chose which buttons he wanted to use, and we added the sticky dots to the back and stuck it on a popsicle stick. We did this until he was satisfied with the results, and added a huge one to the center at the end!
This craft took less than 10 minutes! The perks of not having to wait for glue to dry!! ;)
I am probably going to add some string to this so we can hang it on our tree! :)
Tomorrow I have a very special craft to share, so be sure to check back!! :D
I do have enough that you can get the general idea, though!
Here are the supplies we used:
Popsicle sticks (K chose blue because we had them in the stash, but you could obviously use any color!)
Those awesome double sided sticky dots from yesterday's craft
MORE buttons!!
That's all!
We started by using the sticky dots to build the snowflake.
K then chose which buttons he wanted to use, and we added the sticky dots to the back and stuck it on a popsicle stick. We did this until he was satisfied with the results, and added a huge one to the center at the end!
This craft took less than 10 minutes! The perks of not having to wait for glue to dry!! ;)
I am probably going to add some string to this so we can hang it on our tree! :)
Tomorrow I have a very special craft to share, so be sure to check back!! :D
Thursday, December 4, 2014
12 Days of Christmas Crafts | Day 3 | Toilet Paper Roll Reindeer and Tree
HI!
Today we are using up some toilet paper rolls I had saved for a Thanksgiving craft we never got to!!
For the first one, we made a cute little reindeer!
Here are the supplies we used: (I didn't get them all in the photo!)
A tp roll
fuzzy pompoms (red)
two small black buttons from my stash
textured brown cardstock
Kyle's hand
scissors
pencil
tape
double sided sticky dots
black marker
I first traced both of K's hands onto the cardstock and cut them out.
Then we taped them to the back side of the roll.
K picked a red pompom for the reindeer nose. He wanted it to be like Rudolph. I used a double sided sticky dot to add the nose and eyes. I didn't feel like being patient enough for glue to dry!
To finish it off, K drew a mouth on Rudolph. He said he wanted it to look like he was saying hi! I think he accomplished that! Haha
The second one we made was a Christmas tree. I used a piece of green cardstock, and cut out a (not perfect) triangle shape. Then I fringed the edges.
The button stash!
After that. I let K go to town with 'decorating' the tree. He decided to add all the buttons in a straight line. I used the double sided sticky dots again to adhere the buttons to the paper. L even tried to get in on the action!
All done!! He topped it off with a yellow pompom 'star'.
I used some more sticky dots to stick it to the tp roll, and because I cut the tree little tall, I had to use a popsicle stick to secure it in the back so it wouldn't fall over!
Tomorrow we will be making snowflake ornaments with popsicle sticks!!
Today we are using up some toilet paper rolls I had saved for a Thanksgiving craft we never got to!!
For the first one, we made a cute little reindeer!
Here are the supplies we used: (I didn't get them all in the photo!)
A tp roll
fuzzy pompoms (red)
two small black buttons from my stash
textured brown cardstock
Kyle's hand
scissors
pencil
tape
double sided sticky dots
black marker
I first traced both of K's hands onto the cardstock and cut them out.
Then we taped them to the back side of the roll.
K picked a red pompom for the reindeer nose. He wanted it to be like Rudolph. I used a double sided sticky dot to add the nose and eyes. I didn't feel like being patient enough for glue to dry!
To finish it off, K drew a mouth on Rudolph. He said he wanted it to look like he was saying hi! I think he accomplished that! Haha
The second one we made was a Christmas tree. I used a piece of green cardstock, and cut out a (not perfect) triangle shape. Then I fringed the edges.
The button stash!
After that. I let K go to town with 'decorating' the tree. He decided to add all the buttons in a straight line. I used the double sided sticky dots again to adhere the buttons to the paper. L even tried to get in on the action!
All done!! He topped it off with a yellow pompom 'star'.
I used some more sticky dots to stick it to the tp roll, and because I cut the tree little tall, I had to use a popsicle stick to secure it in the back so it wouldn't fall over!
Tomorrow we will be making snowflake ornaments with popsicle sticks!!
Wednesday, December 3, 2014
12 Days of Christmas Crafts | Day 2 | Coffee Filter Snowflakes
Welcome to day 2!!
Today we made coffee filter snowflakes. I've had a stack of coffee filters hanging around for a while. We own a Keurig, but, we had a drip coffee maker for our camper. We got rid of that coffee maker when we moved , so I really had no use for the filters. I decided they needed to be put to good use!
I'm sure you have seen the gazillion tutorials for different versions of these on Pinterest. If not, you're in the right place!! :)
This craft was kid-friendly enough for my almost 4 year old. He really enjoyed cutting all the shapes. I didn't get a picture of our supplies, but we used:
Plain scissors
Decorative scissors
Hole Punch
Markers
Spray bottle with water
Tape
And, of course, coffee filters.
I folded each filter in half 3 times, so it looked like a piece of pizza when I was done. For a couple of them, I drew shapes that Kyle could cut, but we mostly just free handed everything.
We made quite the mess!!
At the end, we decided we wanted to color a few. (This is where the markers and spray bottle come in!) We colored all over the filter with washable markers, then Kyle got to spray them with water. He really enjoyed watching all the colors run together. Once they were all dry, we cut them into snowflakes, too.
While they were drying, we hung up our white ones. They made a great decoration for our big sliding door!! (This photo was before we added the colorful ones!)
What crafts are you working on?? Feel free to share your photos over on my Facebook page!!
Today we made coffee filter snowflakes. I've had a stack of coffee filters hanging around for a while. We own a Keurig, but, we had a drip coffee maker for our camper. We got rid of that coffee maker when we moved , so I really had no use for the filters. I decided they needed to be put to good use!
I'm sure you have seen the gazillion tutorials for different versions of these on Pinterest. If not, you're in the right place!! :)
This craft was kid-friendly enough for my almost 4 year old. He really enjoyed cutting all the shapes. I didn't get a picture of our supplies, but we used:
Plain scissors
Decorative scissors
Hole Punch
Markers
Spray bottle with water
Tape
And, of course, coffee filters.
I folded each filter in half 3 times, so it looked like a piece of pizza when I was done. For a couple of them, I drew shapes that Kyle could cut, but we mostly just free handed everything.
We made quite the mess!!
At the end, we decided we wanted to color a few. (This is where the markers and spray bottle come in!) We colored all over the filter with washable markers, then Kyle got to spray them with water. He really enjoyed watching all the colors run together. Once they were all dry, we cut them into snowflakes, too.
While they were drying, we hung up our white ones. They made a great decoration for our big sliding door!! (This photo was before we added the colorful ones!)
What crafts are you working on?? Feel free to share your photos over on my Facebook page!!
Tuesday, December 2, 2014
12 Days of Christmas Crafts | Day 1 | Painted Wine Bottles
Hey, hey! Welcome to December!
For the next bottle, I painted it white, and just sprinkled the tinsel glitter all over, heavier at the bottom, and lighter at the top. I originally had a different idea for this one, but I was happy with the simplicity of it. I may add a glitter snowflake once we open our ornament box. I'll add an updated photo if I do. :)
In an effort to get back into my crafting, I have decided to do a 12 days of Christmas crafts! They may not all be specifically Christmas related, but at least winter-y. Most will even be kid-friendly since I will be doing them with at least one of my boys. :)
I have been pondering painting wine bottles for a while now, but I never had a good idea of what I wanted for our home. I saw some really great ones on Pinterest, but A. I wanted ours a little more original, and B. They just didn't "fit" with what I wanted. This morning, I was rummaging through my craft box, and came across some Martha Stewart tinsel glitter and Pearl Ex powder pigments that I have had for a while and have never used! I thought they would be perfect!
I gathered all the supplies I wanted...
Then got to work removing wine bottle labels, and painting them all white.
For the first bottle, I poured a little of the pigment powder into the lid so I didn't have a load dump onto my bottle! Then I sprinkled it all around. I really loved how it fell onto the bottle. I sed these two colors, and layered them until I was satisfied. I ended up doing two bottles this way.
These are the two colors I chose...
Here they are drying on my sink, out of the reach of the littles! I will be finishing the tinsel glitter one by adding a layer of mod podge for protection. For the powdered ones I will spray them with a clear sealant. We don't want glitter or powder all over the house, do we??
once that was all done, I added some leftover clippings from our tree and put them on the ledge at our entry way. I will be adding more to the entry way in the next few days! I can't wait to share my post on how we decorate our house this year!
There you have it. A super easy craft. I didn't have my son help with this one, but you could definitely have a little one pour on some glitter or help with the painting if you are brave enough! All three bottles took me less than an hour (during nap time!) to complete! I would love to see your versions if you decide to paint any bottles this season!
Stay tuned! Tomorrow I will be sharing a kid-friendly snowflake craft! :)
Thursday, March 28, 2013
St. Paddy's Day Crafts
Since it is almost Easter, and since I missed almost the whole month of March, I think it is only fair that I share our crafts we made for St. Patrick's Day! This way, you can be {WAY} ahead for next year!
It seems odd to me that St. Pat's and Easter are in the same month. Isn't Easter supposed to be in April? I am not complaining- I love Easter, but it just seems strange.
Anyways...we made St. Pat's crafts at the beginning of the month, and waited until after to start on the Easter ones ( I will be sharing those soon!)
One of the first crafts we did were these shamrocks:
To make these, I cut one sheet each of dark green, light green, and yellow tissue paper into squares. They do not have to be perfect little squares. Just small enough to have room for lots of colors.
Then, I got a piece of green cardstock and cut out the outline of a shamrock. I got a piece of clear contact paper and placed the outline on to it. I let the boys go to town "decorating" their clovers. Jacob chose to place carefully, while Kyle wanted to dump the whole bucket and be done! :)
When they were all done, I put another piece of contact paper on top to hold it all toether and cut out the shape. It is now hanging on our awesome hanging thing from IKEA.
We also made another painting like the one we made for Valentine's Day. This time, I let Jacob do the painting, and gave Kyle a little canvas of his own to do what he wanted with. I am seriously in love with what J decided to do. It looks awesome! Before I share, here is what that project looked like!
We only made a *little* mess!! :)
J hard at work!
Here is the end result! I can't stop looking at it! I think he did a great job!
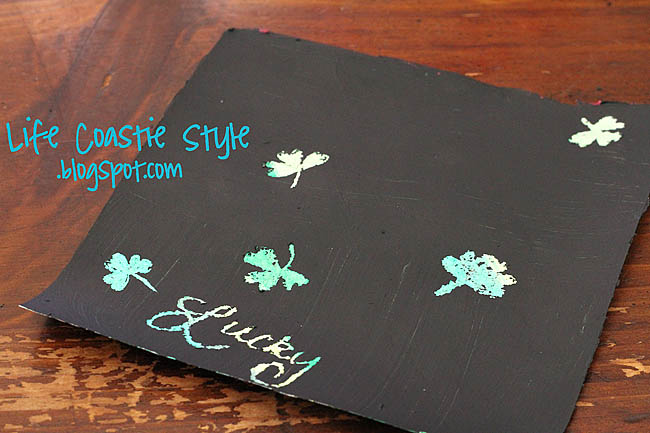
One final thing we ( I ) did was a scratch art picture. I will be sharing the whole project next week, but for now, this is what it looked like to start
I can't wait to finish sharing the rest of our month with you! See you soon!
It seems odd to me that St. Pat's and Easter are in the same month. Isn't Easter supposed to be in April? I am not complaining- I love Easter, but it just seems strange.
Anyways...we made St. Pat's crafts at the beginning of the month, and waited until after to start on the Easter ones ( I will be sharing those soon!)
One of the first crafts we did were these shamrocks:
Then, I got a piece of green cardstock and cut out the outline of a shamrock. I got a piece of clear contact paper and placed the outline on to it. I let the boys go to town "decorating" their clovers. Jacob chose to place carefully, while Kyle wanted to dump the whole bucket and be done! :)
When they were all done, I put another piece of contact paper on top to hold it all toether and cut out the shape. It is now hanging on our awesome hanging thing from IKEA.
We also made another painting like the one we made for Valentine's Day. This time, I let Jacob do the painting, and gave Kyle a little canvas of his own to do what he wanted with. I am seriously in love with what J decided to do. It looks awesome! Before I share, here is what that project looked like!
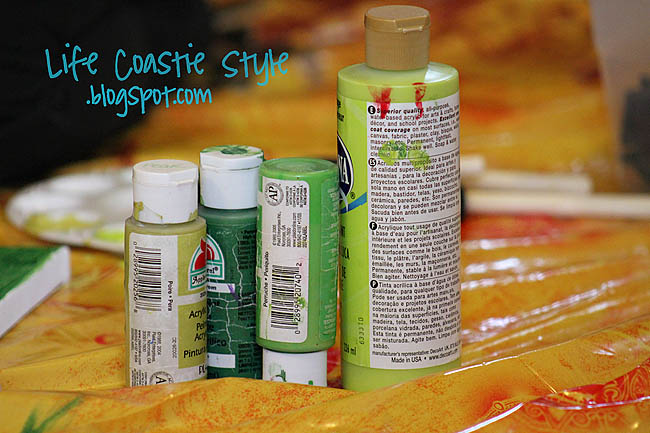
Lots of green paint!
We only made a *little* mess!! :)
Here is the end result! I can't stop looking at it! I think he did a great job!
One final thing we ( I ) did was a scratch art picture. I will be sharing the whole project next week, but for now, this is what it looked like to start
I can't wait to finish sharing the rest of our month with you! See you soon!