Showing posts with label kids. Show all posts

Friday, December 5, 2014

12 Days of Christmas Crafts | Day 4 | Popsicle Snowflakes

Today's craft does not include a lot of photos, unfortunately. There are two reasons for this: 1. It went so fast. 2. L decided he REALLY wanted to help and kept sticking his cute little chubby hands in every photo! :) (See below!)
 I do have enough that you can get the general idea, though!

Here are the supplies we used:
 Popsicle sticks (K chose blue because we had them in the stash, but you could obviously use any color!)
Those awesome double sided sticky dots from yesterday's craft
MORE buttons!!
That's all!

We started by using the sticky dots to build the snowflake.


K then chose which buttons he wanted to use, and we added the sticky dots to the back and stuck it on a popsicle stick. We did this until he was satisfied with the results, and added a huge one to the center at the end!


This craft took less than 10 minutes! The perks of not having to wait for glue to dry!! ;)
I am probably going to add some string to this so we can hang it on our tree! :)


Tomorrow I have a very special craft to share, so be sure to check back!! :D

Thursday, December 4, 2014

12 Days of Christmas Crafts | Day 3 | Toilet Paper Roll Reindeer and Tree

HI!

Today we are using up some toilet paper rolls I had saved for a Thanksgiving craft we never got to!!
For the first one, we made a cute little reindeer!
Here are the supplies we used: (I didn't get them all in the photo!)
A tp roll
fuzzy pompoms (red)
two small black buttons from my stash
textured brown cardstock
Kyle's hand
scissors
pencil
tape
double sided sticky dots
black marker


 I first traced both of K's hands onto the cardstock and cut them out.

Then we taped them to the back side of the roll.

K picked a red pompom for the reindeer nose. He wanted it to be like Rudolph. I used a double sided sticky dot to add the nose and eyes. I didn't feel like being patient enough for glue to dry!


To finish it off, K drew a mouth on Rudolph. He said he wanted it to look like he was saying hi! I think he accomplished that! Haha


The second one we made was a Christmas tree. I used a piece of green cardstock, and cut out a (not perfect) triangle shape. Then I fringed the edges.
The button stash!


After that. I let K go to town with 'decorating' the tree. He decided to add all the buttons in a straight line. I used the double sided sticky dots again to adhere the buttons to the paper. L even tried to get in on the action!


All done!! He topped it off with a yellow pompom 'star'.

I used some more sticky dots to stick it to the tp roll, and because I cut the tree little tall, I had to use a popsicle stick to secure it in the back so it wouldn't fall over!


Tomorrow we will be making snowflake ornaments with popsicle sticks!!

Wednesday, December 3, 2014

12 Days of Christmas Crafts | Day 2 | Coffee Filter Snowflakes

Welcome to day 2!!
Today we made coffee filter snowflakes. I've had a stack of coffee filters hanging around for a while. We own a Keurig, but, we had a drip coffee maker for our camper. We got rid of that coffee maker when we moved , so I really had no use for the filters. I decided they needed to be put to good use!
I'm sure you have seen the gazillion tutorials for different versions of these on Pinterest. If not, you're in the right place!! :)

This craft was kid-friendly enough for my almost 4 year old. He really enjoyed cutting all the shapes. I didn't get a picture of our supplies, but we used:
Plain scissors
Decorative scissors
Hole Punch
Markers
Spray bottle with water
Tape
And, of course, coffee filters.
I folded each filter in half 3 times, so it looked like a piece of pizza when I was done. For a couple of them, I drew shapes that Kyle could cut, but we mostly just free handed everything.


We made quite the mess!!


  At the end, we decided we wanted to color a few. (This is where the markers and spray bottle come in!) We colored all over the filter with washable markers, then Kyle got to spray them with water. He really enjoyed watching all the colors run together. Once they were all dry, we cut them into snowflakes, too.


While they were drying, we hung up our white ones. They made a great decoration for our big sliding door!! (This photo was before we added the colorful ones!)


What crafts are you working on?? Feel free to share your photos over on my Facebook page!!

Tuesday, April 2, 2013

Scratch Art!

      Do you remember getting the little scratch art kits as a kid? The ones that look black and come with the little stick so you can scratch your way to an awesome picture? I loved those!
      I am an assistant in an art class, and this was one of the recent assignments for the kids. I made one myself in high school, and I forgot how easy it was to do, and how much fun it could be. I am so glad I was reminded. Of course, I had to share it with my own kiddos, and now with you!
     First, I had them color a blank piece of paper out of the art pad. A heavy piece of cardstock will work, too! Just draw any pattern or design. Any colors. I reminded J to color pretty dark. He had no idea what we were doing, so he just thought I was being crazy asking him to draw a random pattern and push hard! For mine, I chose to do different shades of green since I was going to use it as part of my St. Patrick's Day decor. Jacob chose to use different bright colors. I also made one for K to do, and chose different colors. I made a diagonal line pattern. Jacob did big blocks.
     Then, I pulled out my bottle of *black* acrylic paint and painted over it all! Again- J thought I was crazy for destroying his art work!! I did two coats to make sure it was all covered nicely.
      We let it dry overnight and the next day I gave J a skewer (just one for shishkebobs, nothing fancy!) and it was then that he realized what the heck we were doing! He was pretty excited! He got right to work making his masterpiece!
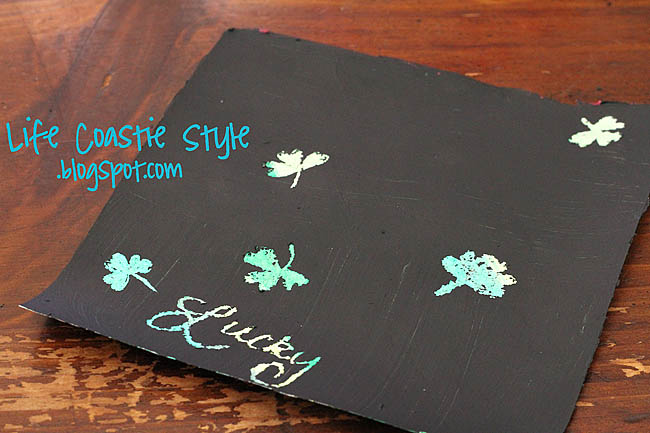
This is the beginning of mine for St. Pat's
 
And the end result!


Can you find the four-leafed clover?

 
Kyle had fun scribbling his to reveal the color!


 J was hard at work in his pjs, so he wouldn't let me get a full photo of him! :)

Can you tell what it is??
 

Come back tomorrow to see the finished piece!!


We had a lot of dun doing this craft! We always enjoy craft days!
What are you making this week??
I would love to see your photos and ideas! You can share them over at the LCS Facebook page!


See you soon!

Friday, March 29, 2013

IKEA Hacks

        Have you heard of these? I just recently had a conversation about this new trend. Now I love IKEA, but I never thought to makeover the items i have bought.
        Until I heard someone talk about these hacks...So I started to do some research. I have this table from IKEA that I bought for my little one. I wanted something that he could sit and eat or play at, that didn't take up too much space, so he could be in the kitchen with me. This table won when I saw that it came with two chairs and was only $20! I started to browse through Pinterest (there are lots of great ideas there!) and saw people were doing all kinds of makeovers to IKEA furniture! I started to get really excited!
         Now, I am a very much an instant gratification kind of girl. I did not want to wait until my husband came home to help, so I got to work. I went into the garage and found out we had some paint left over from when I painted our entry way. It was blue...how perfect for a little boy! Then I found the leftover chalkboard paint from painting our chalkboard wall...even better! Finally, I wanted something fun for the chair covers. During my research, I saw many options. Since I knew my two-year-old would be eating/drinking (Spilling!) at this table, I wanted something that was somewhat water resistant...(Insert light bulb moment here) I chose contact paper!! We always have lots of it, so, once again, I didn't have to make a special trip. Instead of just using plain white (boring) contact paper, I used some clear and put a colroful piece of scrapbook paper underneath! Are you ready to see the results?
First- here is the before:


 Cute, but boring!
Here is the mess I made while refinishing!
 
And the seat with scrapbook paper and contact paper
 
Did I tell you the best part....I used chalk board paint for the top!!


And finally....the finished product!


What do you think?? I would love to see anything you have transformed from IKEA!!


Thursday, March 28, 2013

St. Paddy's Day Crafts

       Since it is almost Easter, and since I missed almost the whole month of March, I think it is only fair that I share our crafts we made for St. Patrick's Day! This way, you can be {WAY} ahead for next year!
       It seems odd to me that St. Pat's and Easter are in the same month. Isn't Easter supposed to be in April? I am  not complaining- I love Easter, but it just seems strange.
       Anyways...we made St. Pat's crafts at the beginning of the month, and waited until after to start on the Easter ones ( I will be sharing those soon!)
One of the first crafts we did were these shamrocks:

 To make these, I cut one sheet each of dark green, light green, and yellow tissue paper into squares. They do not have to be perfect little squares. Just small enough to have room for lots of colors.


Then, I got a piece of green cardstock and cut out the outline of a shamrock. I got a piece of clear contact paper and placed the outline on to it. I let the boys go to town "decorating" their clovers. Jacob chose to place carefully, while Kyle wanted to dump the whole bucket and be done! :)


When they were all done, I put another piece of contact paper on top to hold it all toether and cut out the shape. It is now hanging on our awesome hanging thing from IKEA.

We also made another painting like the one we made for Valentine's Day. This time, I let Jacob do the painting, and gave Kyle a little canvas of his own to do what he wanted with. I am seriously in love with what J decided to do. It looks awesome! Before I share, here is what that project looked like!
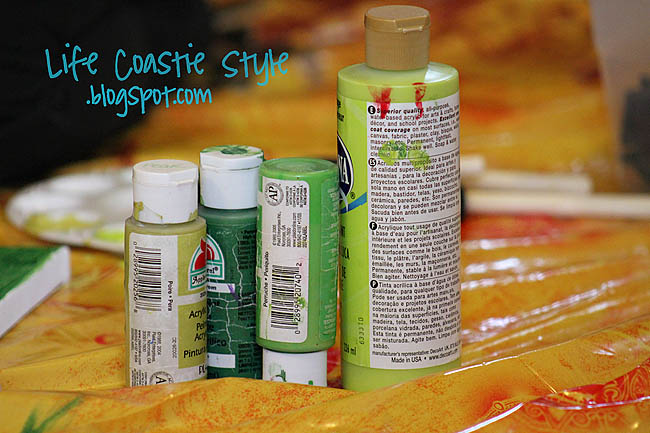
Lots of green paint!


We only made a *little* mess!! :)

 
J hard at work!

Here is the end result! I can't stop looking at it! I think he did a great job!


One final thing we ( I ) did was a scratch art picture. I will be sharing the whole project next week, but for now, this is what it looked like to start


 I can't wait to finish sharing the rest of our month with you! See you soon!